*All the photos and content are authorized by Steven, a great content creator. Many thanks to @Expedition Builds for sharing such great content with us!
Hi,guys! It's Steven here! 😀Looking for a great way to securely lock the hood on your Jeep JL/JT? We install and review Lasfit's new Stealth Hood Lock System. Installation is essential for this hood lock. Follow our installation guide step-by-step and then you will be all set!
Parts Included In The Box:

Tools & Materials Needed:
- A Standard Screwdriver
- A Clip Removal Tool
- A Trim Removal Tool
- Torx T30 Bit
- 8mm and 10mm Combo Wrench
- Wire Cutter
- Zip Ties

*Note: The Lasfit Hood Lock is fit for 2018+ Wrangler JL, JLU, and 2019+ Gladiator JT. NOT compatible with the manual transmission.
Step1: Removing The Grille On The Jeep.
Locate these six push-in pins pop them up halfway and remove the clips.

Step2: Attach The Air Hoses To The Locking Mechanism.
Connect the air tube to the connector on the LEFT, then connect the air tube with a white marking to the connector on the RIGHT.
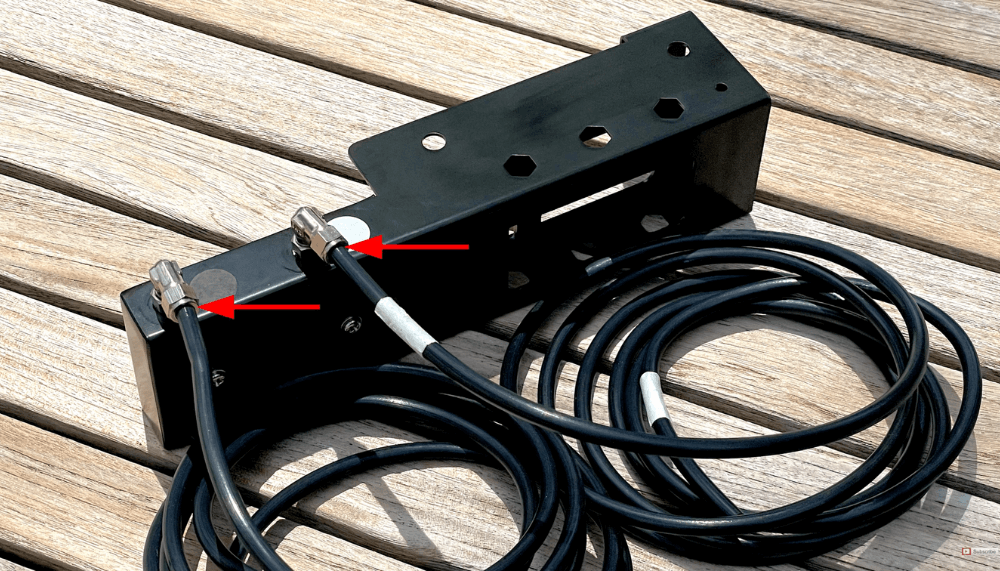
To make it easier to handle the air hoses, I've taped them together so they act as one piece.

Step3: Install The Lock Mechanism.
Grab a T30 Torx Bit and let's remove two of these bolts on the braces. Because my winch is previously installed on my jeep I wasn't able to fully remove my grille, I was able to work in there, however.

Next, we'll install the lock mechanism and bolt it back up. Here's a completed look, you can see how nice and clean the locking mechanism fits right onto the front of the Jeep.

Step4: Routing of The Air Hoses.
First, run up the air hoses under the driver's side headlamp and along the engine bay. Next, let's locate this factory firewall plug and remove it simply prys out.

Here's the factory firewall plug removed I'm going to drill a half-inch hole through the middle of it to accept the two air hoses which will run into the cabin.

Step5: Mounted The Pneumatic Actuator Onto The Bracket.
First, use a trim tool to pry off the panel underneath the steering column, these are the plastic clips that should be prying loose.

With the kick panel removed locate this hole in the upper crossbar, we're going to add a nut to it. Remove the red tape insert the nut from behind the hole, line it up with a bolt, and press it into place.

Next, locate the lower horizontal crossbar, and with an eight millimeter remover this bolt part way. Then, I mounted the pneumatic actuator onto the bracket, it will bolt up here and here using the supplied hardware. And here's that assembly installed into the Jeep.

Step6: Install The Manual Unlock Switch.
Next, we'll install the manual unlock switch slide it over that loose eight-millimeter bolt, and then tighten it down, the button needs to be facing downward, it looks like this when you're finished.
Find the harness and plug it into the side of the controller box. Now we can plug the OBD II passthrough cable into the Jeep's OBD II port.

Now we can connect the air tubes to the controller box by pushing them into the connectors, and paying attention to the colors. Connect the air tube with a white marking to the white connector and the black air tube to the black connector.

Step7: Route The CAN-BUS Harness To The Passenger Side And Connect It To The CAN-BUS Terminal.
Next, we will route the Canbus harness to the passenger side it looks like this. At the base of the center console, we're going to need to fish that Canbus harness across the console out the other side and it's going up behind the glove box.

Behind the glove box, you're going to find this green canvas terminal board, plug the canvas harness onto any available slot on the green canvas terminal board.

Step8: Synchronize The New Hood Lock System To Your Canbus.
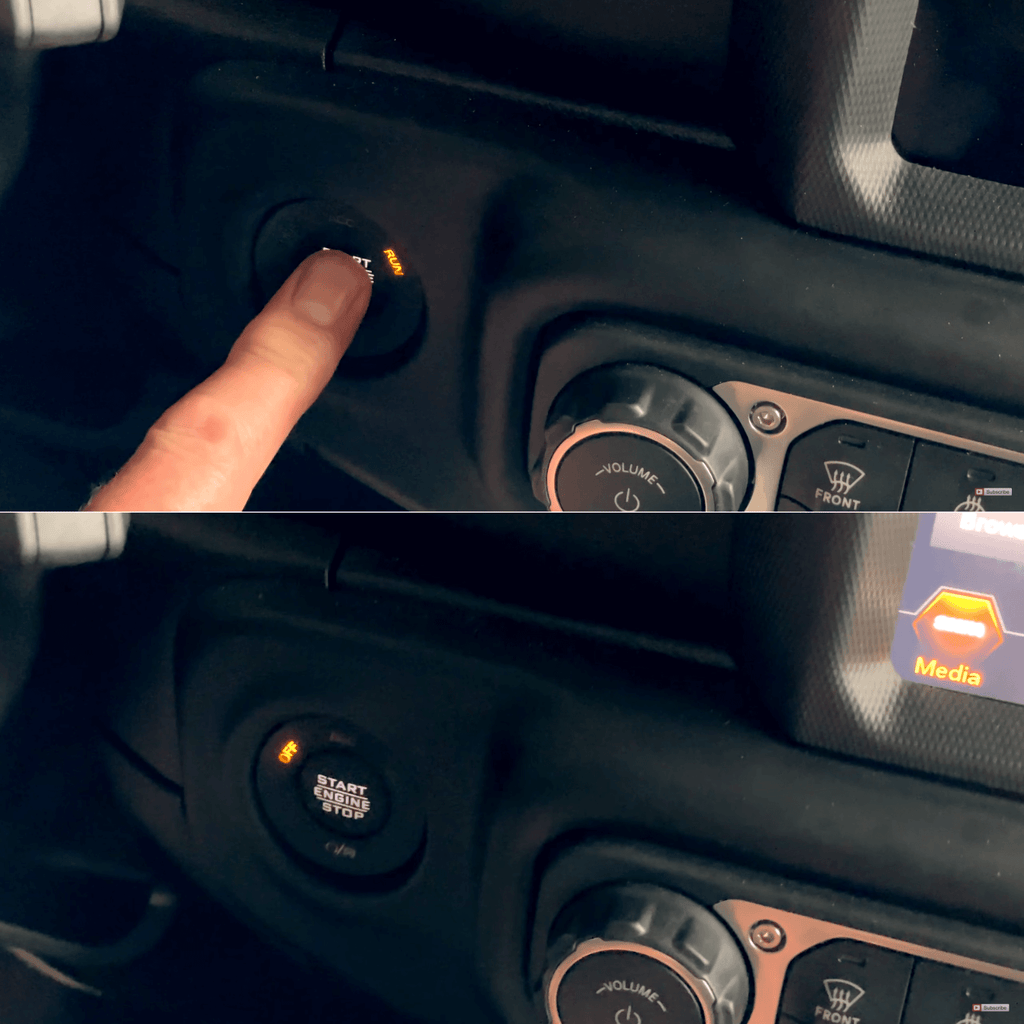
Installation is now complete and it's time to synchronize the new hood lock system to your Canbus. To do this start the jeep for one minute then turn it off, turn on the ignition without starting the jeep, turn off the ignition and the synchronizing procedure is completed.
Check out a more detailed installation video on @Expedition Builds channel if you're interested👇
Here are some final thoughts on the Lasfit Stealth Hood Lock system. I love the peace of mind of the springs knowing that I can securely lock the hood on my Jeep and I can do it through my factory key fob. Maybe this mod is right for your Jeep as well!

*Hopefully, this helps you out if you're in the market for some new hood locks/latches and/or are curious about the LASFIT Stealth Anti-Theft Hood Lock. As always, feel free to reach out with any questions or comments.
Questions or Comments? Leave them below!